Thank you for purchasing my plugin. If you have any questions that are beyond the scope of this help file, please feel free to email at opencartmart@gmail.com. Thank you so much!
What it is?
X-Payment is a payment module that allows you create custom payment method for your store. Also it gives option to integrate third party gateways
Installation
- First unzip downloaded zip file. Now get your xpayment.ocmod.zip for your OC version
- Please Go to Admin -> Extensions -> Extension Installer. Upload xpayment.ocmod.zip and click on continue.
- Now please navigate to admin -> Extensions -> Payment. Now click the Install button of the X-Payment.
- Now please navigate to admin -> Extensions -> Modification. Now click the Refresh Button.
- Congrats! You are done. Now it is ready for adding payment method.
Setup Your Payment
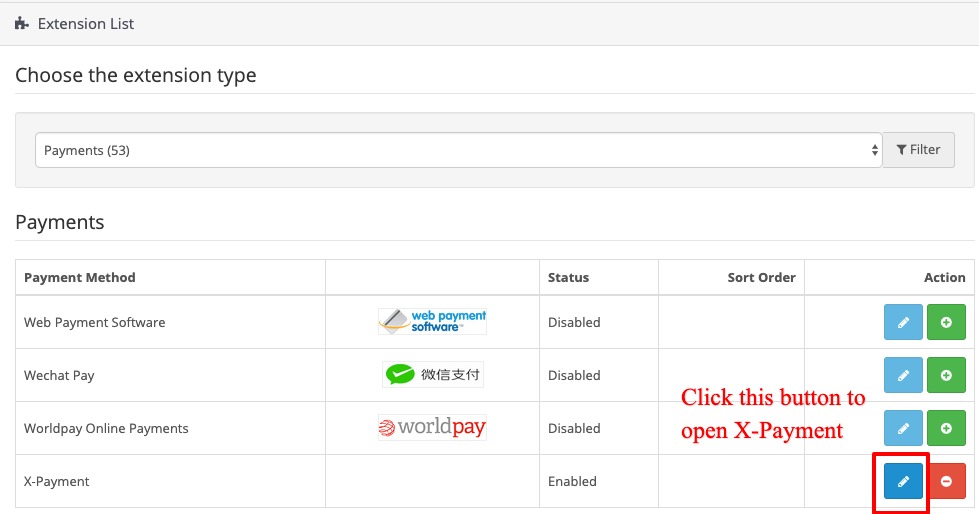
Lets create our first method. Please navigate to Extension -> Payment. Now click the Edit button of the X-Payment.
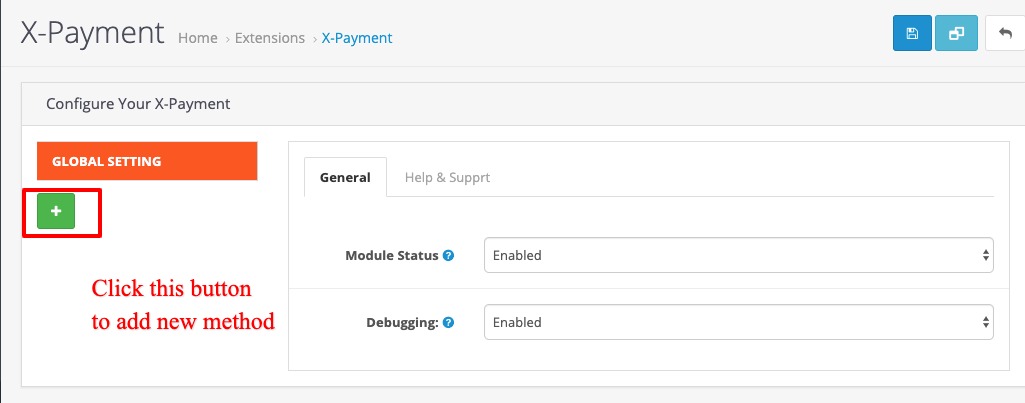
In Global setting tab, Please change module status to `Enabled` to activatie the module. Then click the plus sign to initiate a new method.
Payment Description
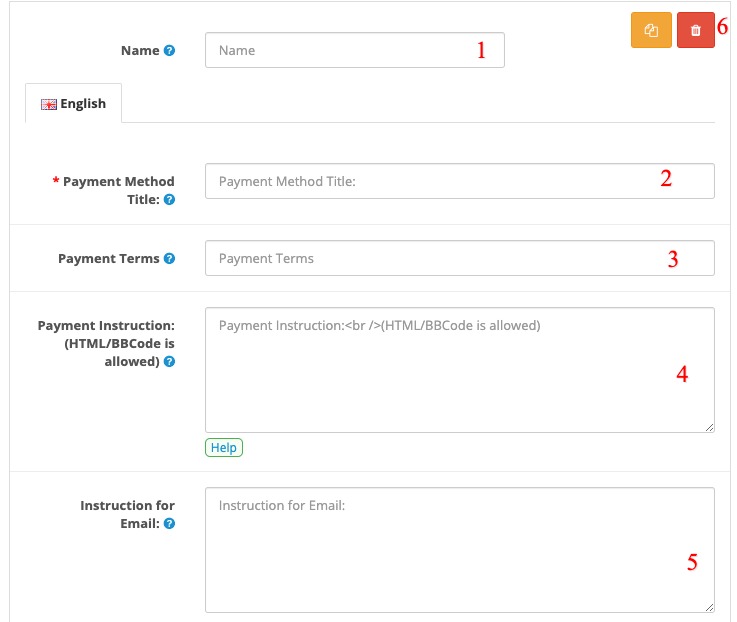
- Name: For admin use only. It helps you to differentiate a method from others sharing same name on the store
- Payment Method Title: This name will appear during chekout on the store.
- Payment Terms: Optional. This text appears right after payment method name during checkout.
- Payment Instruction: Payment instruction for the customers. It will be presented to customers during checkout process. You can utilize any placeholders in the instruction. Also it is possible to put xform shortcode to display a form created by X-Form!
- Instruction for Email: Optional. If you want to have different instruction for the order email, Please use this field.
- Copy/Delete Button of the method
General Setting
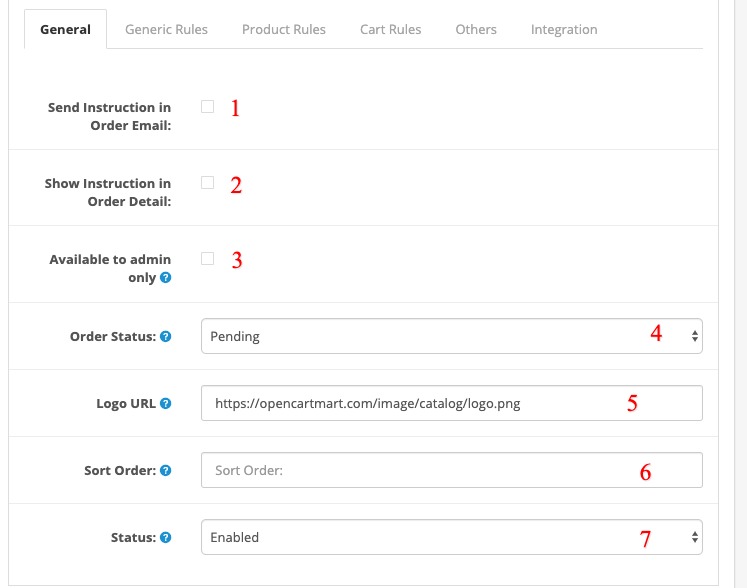
- Send Instruction in Order Email: Payment instruction will be sent over order order.
- Show Instruction in Order Detail: Payment instruction will be displayed in the order detail page on the store
- Available to admin only: This method will not appear to the customers unless Customer is an Admin of the store.
- Order Status: Define the order status what you want to apply when an order is completed using this method
- Logo URL: Logo will appear right before method title on the checkout page
- Sort Order Set the postion of the method amoung methods created by X-Payment
- Status Enable/Disable the method
Generic Rules
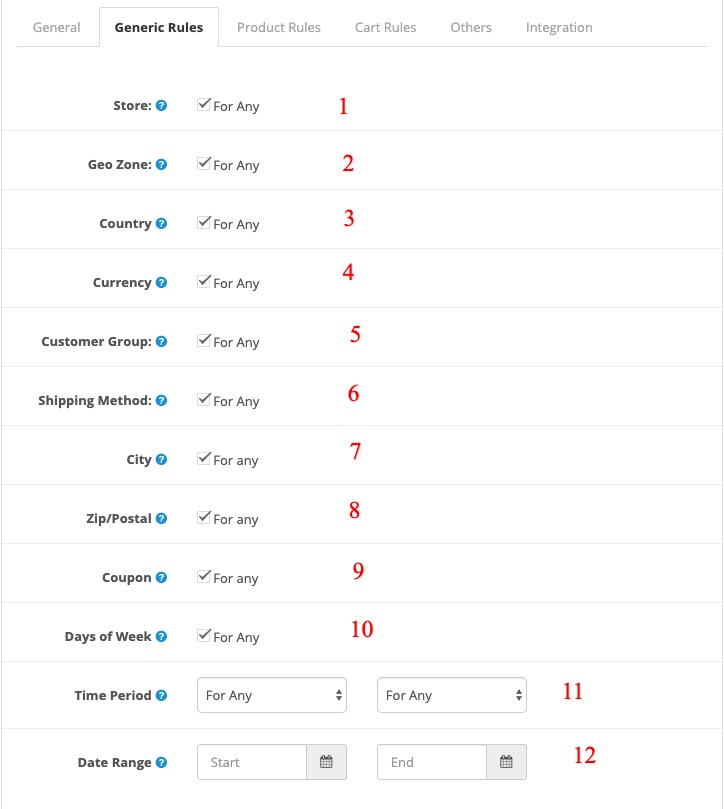
- Store: Choose applicable stores this method would be available with.
- Geo Zone: Choose applicable GEO zone this method would be available with.
- Country: Choose applicable countries this method would be available with.
- Currency: Choose applicable countries this method would be available with.
- Customer Group: Please select the customer group you want to make this method valid for.
- Shipping Method: Please select the Shipping method you want to make this method valid for.
- City: Choose applicable manufacturer this method would be available with.
- Zip/Postal: Choose applicable zip/postal codes this method would be available with. Please check this article to know more details about postal rules.
- Coupon: Choose applicable Coupon codes this method would be available with.
- Days of Week: Define the days you want to make this method valid for.
- Time Period: Define time period you want to make this method valid for.
- Date Range: Define date Range you want to make this method valid for.
Product Rules
Please check Product rules for knowing details about their rules
- Category Rule: Select your appropiate category rule, then choose your categories accordingly.
- Product Rule: Select your appropiate Rule rule, then choose your Products accordingly.
- Manufacturer Rule: Select your appropiate manufacturer rule, then choose your manufacturers accordingly.
Cart Rules
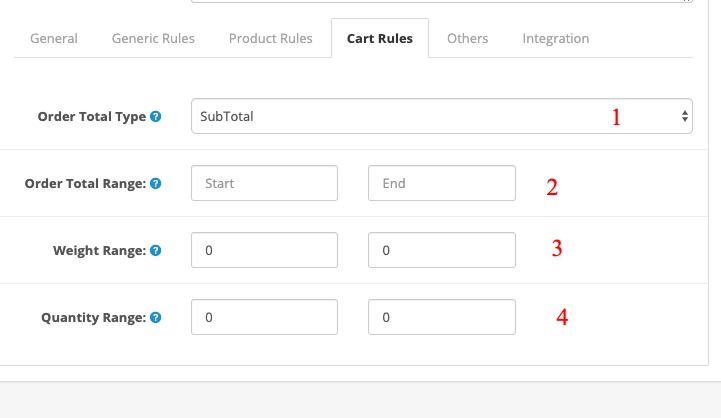
- Order Total Type: Define how do you want to calculate order total range.
- Order Total Range: Please enter order total range the method will valid for
- Weight Range: Please enter order weight range the method will valid for
- Quantity Range: Please enter order quantity range the method will valid for
Others
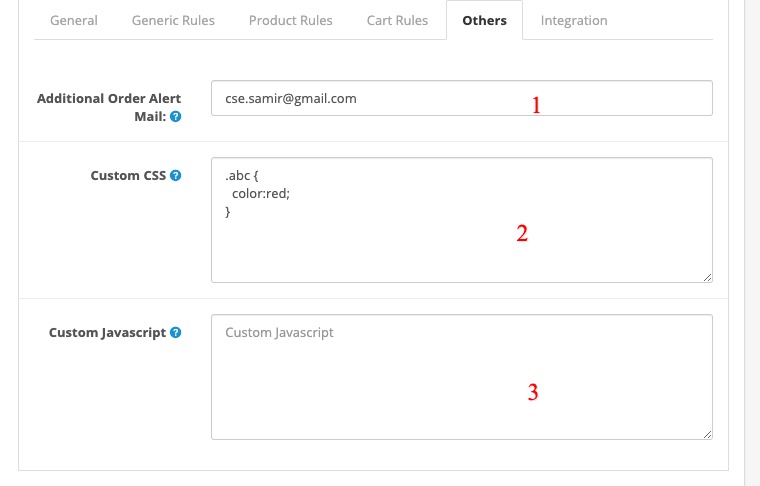
- Additional Order Alert Mail: Any additional emails you want to receive admin order email when customer choose this payment method. (comma separated).
- Custom CSS: Additional style i.e. CSS if you want to use. Don't put inside style tag. Just enter your css rule. e.g .box {background:#2f96c9;}
- Custom Javascript: Any javascript if you want to use. Don't put inside script tag, just add your javascript code. X-Payment will add script tag itself
Integration
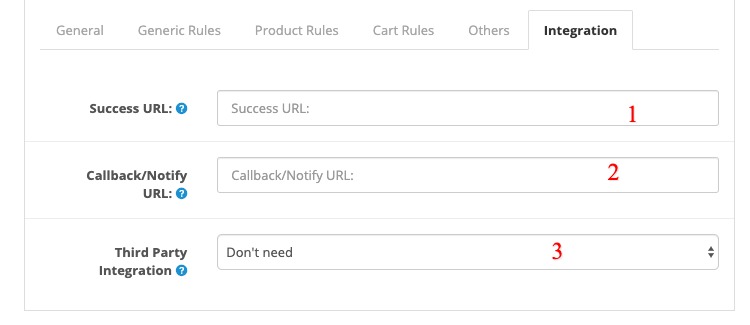
- Success URL: data-original-title="If you want to overwrite success page URL, Please enter here. Placeholders are availables
- Callback/Notify URL: If you want to call/execute/notify any url once order is completed. It will be called/invoked silently.
- Third Party Integration: If you want to integrate third party payment method this options are required to use. Please check these blog post to get basic idea of the integration
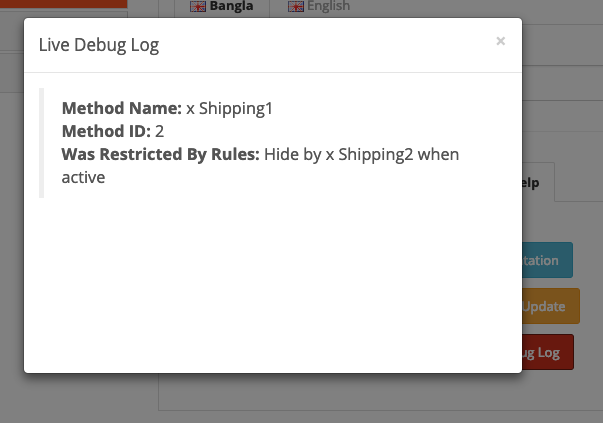
Live Debugging
Live debug option is available in Admin -> Global Setting -> Help -> Live Debug.
Debugging can help you to find out why your payment method did not show up in the site. First enable debug mode in xpayment global setting.
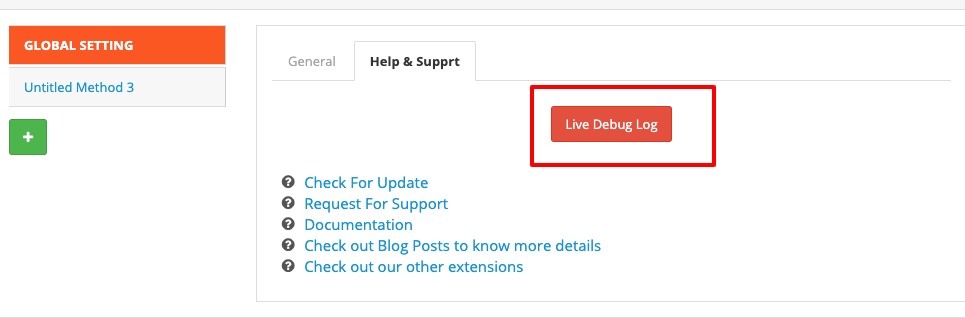
Once debug mode is ON, click the Live Debug button in Admin -> Global Setting -> Help -> Live Debug and keep the debug window open. Now try to checkout on the site or estimate payment cost in the shopping cart page. Look get your eyes back on the debug window, it would pring rules names why a particular payment method was not showed up.
FAQ
Q. I am not getting X-Payment under admin -> Extensions -> Payment.
A. Usually it happens in OC 2.x. It simply means that your X-Payment installation was not done correctly. Most probably your ftp root is incorrect under store setting. Please recheck ftp root under store setting and re-install xpayment again.
Q. I am not able to install xpayment through Opencart Installer in Opencart v2.x.
A. Usually happens in OC 2.x. Most probably your ftp information is wrong under store setting. Please recheck ftp root under store setting and re-install xpayment again. If problem persist, it could be opencart core issue. In that case you can install manually, check this youtube video.
Q. Payment logo is not showing up.
A.It may be incompatilibity issue with your checkout module. Please send an email at opencartmart@gmail.com so we can check and adjust as per your checkout module.
Q. I want to integrate third party payment gateway, what should I do?
A. Frankley you have to have basic programing knowledge to integrate payment gateway as every gateway need to be followed some rules that mostly related with programing code. We would suggest to check these blog post to get basic idea of the integration. Moreover we can help you if you need. If the integration does not need any X-payment addon to full fill the requirments we don't charge any payemnt. But if the integration need add-on, then we charge depending the complexity of the gateway.